Multifactor Authentication (MFA) Initial Setup with an Authentication App

MFA can be configured via Text Message, an Authentication App, or both.

To use an app, download from the app store for your device.

Time needed: 10 minutes

Multifactor authentication (MFA), also known as two-factor authentication (2FA), is a feature which allows users to better protect their account by requiring additional steps when signing in. MFA increases security on your account by requiring you to first sign in using your username and password, then approve the sign in request using a second factor like your mobile phone.
 
We recommend installing the Microsoft Authenticator to your mobile phone. It is available on both the App Store for iPhone and Google Play for Android. You can easily Approve or Deny login requests via a prompt on your phone.
 
Microsoft Authenticator

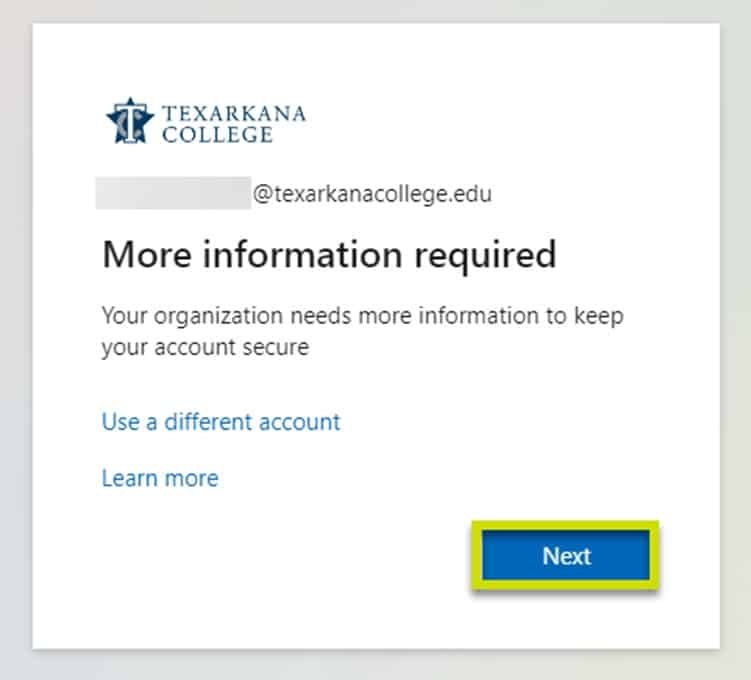
  1. When logging in to myTC, you will be prompted with the “More information required” screen. Select “Next”.

    A login screen for Texarkana College displays a message saying More information required with options to use a different account, learn more, and a highlighted Next button at the bottom.

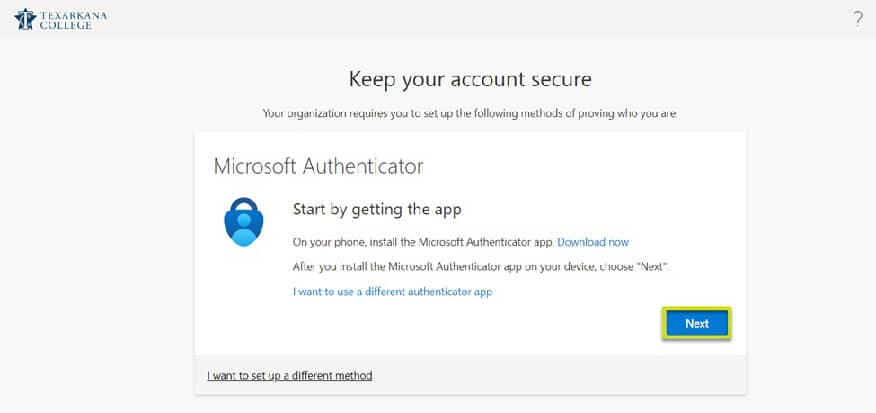
  2. The next prompt will ask you to get the Microsoft Authenticator app. If you haven’t already, install the Microsoft Authenticator app now, and then select Next.

    A webpage from Texarkana College instructs users to set up Microsoft Authenticator for account security, with a highlighted blue Next button and a link to download the app.

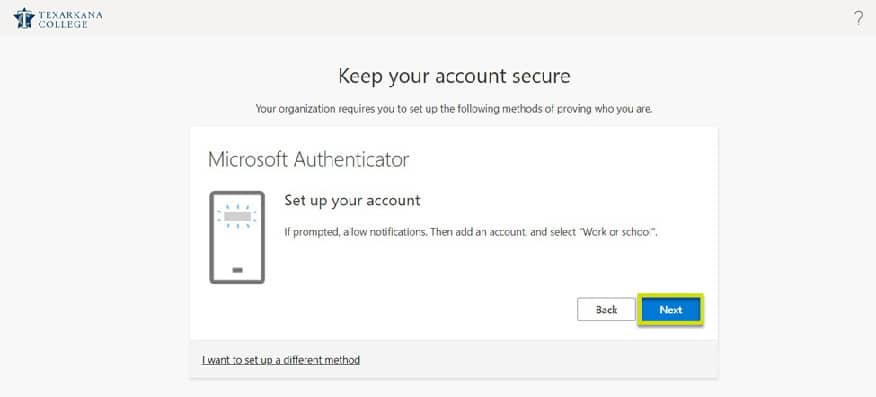
  3. Select Next on the Set up your account prompt.

    Screenshot of a Microsoft Authenticator setup page for Texarkana College, prompting the user to set up their account with a highlighted Next button. There are also Back and alternative setup options.

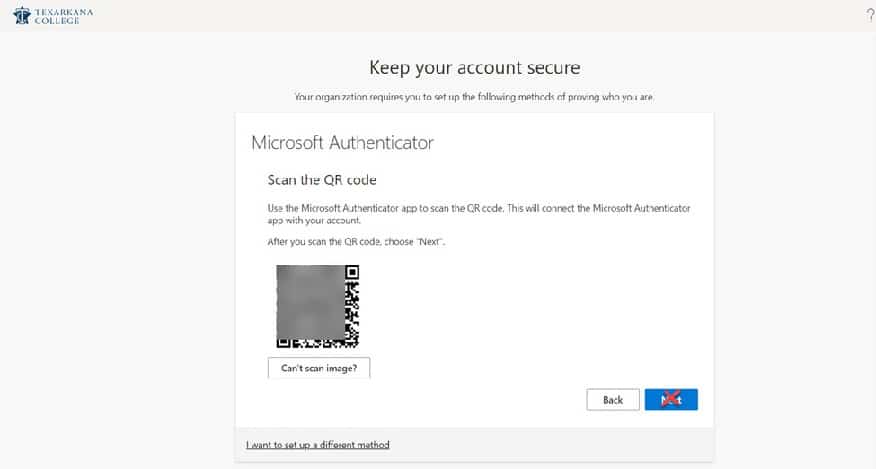
  4. When you see the Scan the QR code prompt, do not hit next. Continue to step 5.

    A computer screen displays a Keep your account secure prompt for setting up Microsoft Authenticator by scanning a QR code, with options for Back and Next at the bottom.

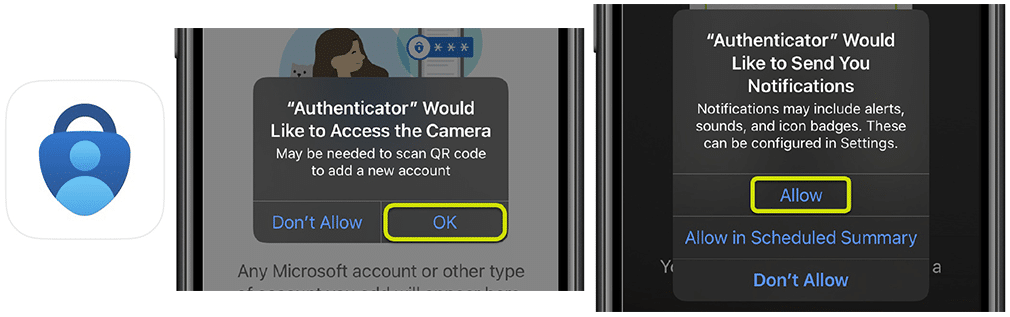
  5. On your mobile phone, open the Authenticator app. When prompted, allow the Authenticator app access to your camera and to send notifications.

    A Microsoft Authenticator app icon and two phone prompts: one asks for camera access with OK highlighted, and the other asks to send notifications with Allow highlighted.

  6. Depending on the device, you will get one of the following screens (a or b):

    For screen A skip to step 7. For screen B select Add account or the + icon. Then select Work or school account then Scan QR codeFour smartphone screens show steps to add a work or school account using Microsoft Authenticator: selecting “work or school account,” tapping “Add account,” choosing the account type, and scanning a QR code.

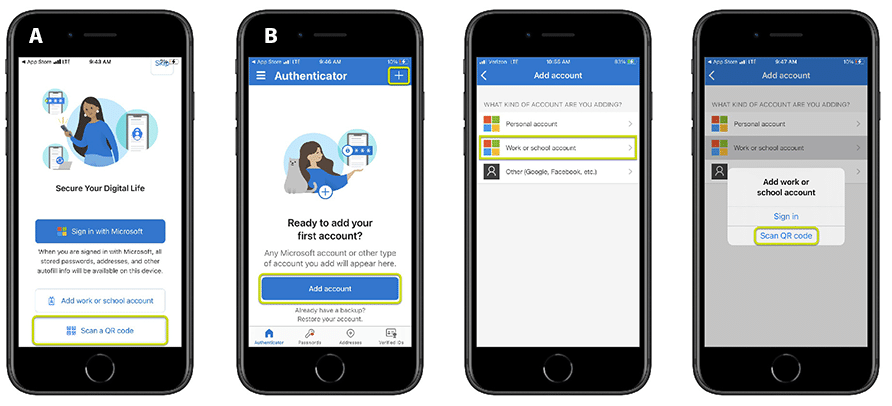
  7. Scan the QR image with your mobile phone.

    A computer screen displays instructions to set up Microsoft Authenticator by scanning a QR code, with Back and highlighted Next buttons at the bottom. The Tekurauna College logo is in the top left corner.

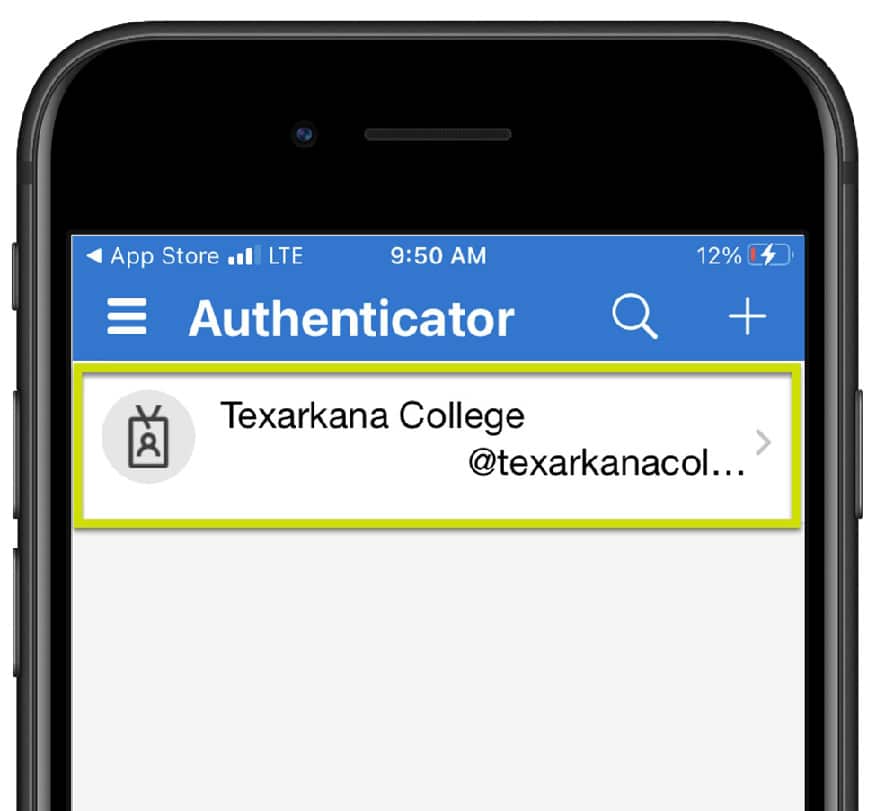
  8. Your account will now be listed in the Authenticator App.

    A smartphone screen displays the Authenticator app with an account for Texarkana College listed, showing the username @texarkanacol... and a college logo icon to the left.

  9. Select Next on your computer.

    A computer screen displays instructions to set up Microsoft Authenticator by scanning a QR code, with Back and highlighted Next buttons at the bottom. The Tekurauna College logo is in the top left corner.

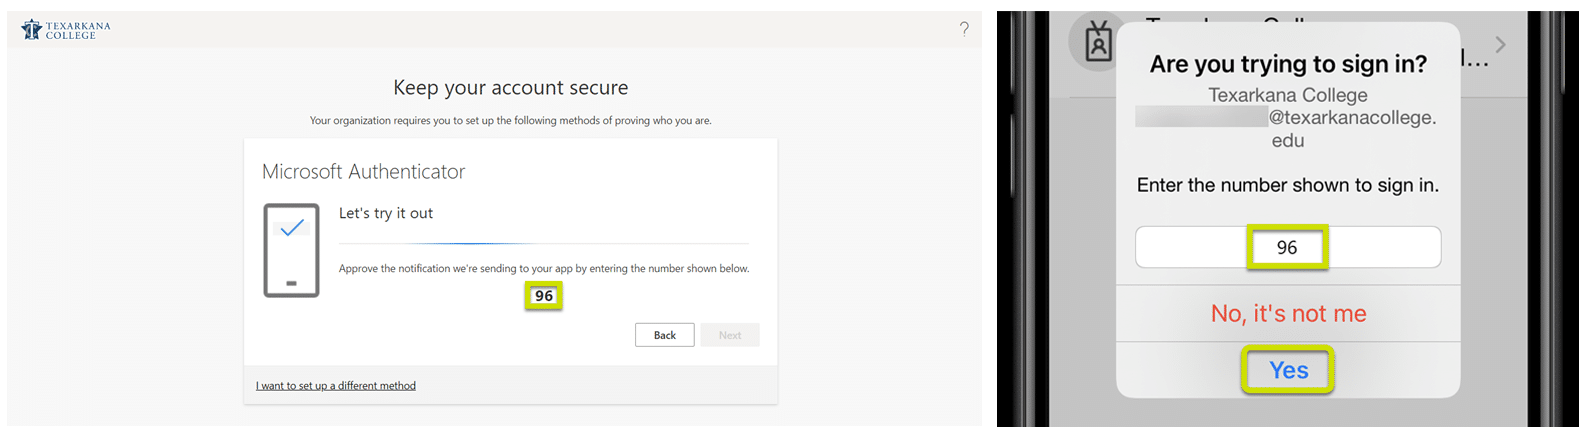
  10. Enter the number displayed on the screen into the prompt on your mobile phone and select Yes.

    Side-by-side screens: left shows a prompt to use Microsoft Authenticator with the number 96 displayed; right shows a phone asking to enter the number 96 to sign in, with Yes highlighted.

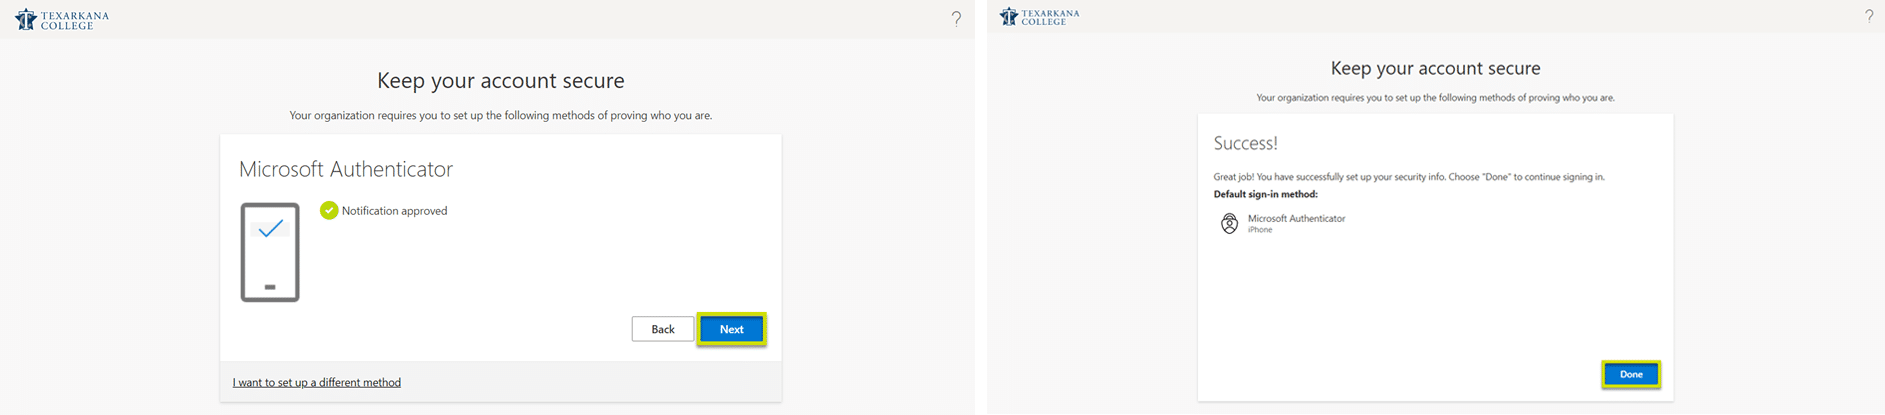
  11. You will receive a “Notification approved” message on your computer, select Next, and then Done.

    Two screenshots: left shows Microsoft Authenticator with Notification approved and a highlighted Next button; right shows Success! message with a highlighted Done button, both under Keep your account secure for Texarkana College.